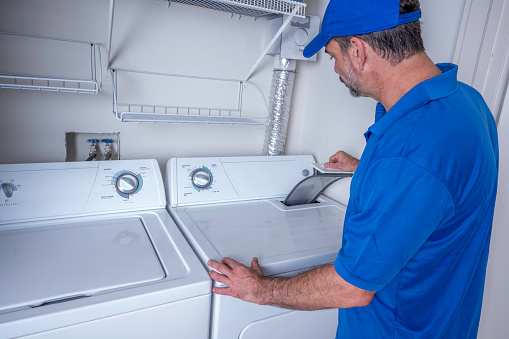
How To Repair A Heating Element For a Dryer

Many electric dryers need A heating element to warm the air inside the dryer drum. According to your dryer model, either a circular heating element sits immediately behind your dryer’s drum and heats the air inside the drum, or the heating element installs inside the housing and heats the air as it travels through the blower. Your dryer’s heating element may malfunction if it takes longer than usual to dry your clothing or if the air inside the dryer never becomes warm. To find out if your heating element needs to be replaced, you can test it.
How to Inspect the Heating Element in a Dryer
Keeping your dryer running smoothly is essential to keeping your clothes looking good and minimizing drying time. If you have noticed your dryer is not heating up as well as it used to, you may want to know how to inspect the heating element and what you should do to fix the problem. Here’s how you can inspect it. We offer the Best Dryer Vent Cleaning in Norcross. Give us a call today!
Items You’ll Need
Screwdriver
Sharp-nosed pliers
Tester for continuity
Instructions:
- Unplug your dryer from the wall outlet in the utility room. To remove the vent from the back of your dryer, loosen the screw holding the vent clamp. If necessary, move the dryer from its installation spot so you can access the dryer’s back.
- Locate the dryer’s heating element. Depending on the type, the dryer’s heating element may be found either behind the dryer drum inside the cabinet or behind a panel on the dryer’s rear. The dryers made by each company differ from one another. However, you may probably access the dryer’s heating element from the back of the dryer looks to have a separate rear panel that sticks out from the cabinet by a few inches.
- Most importantly, you must disassemble your dryer and remove the drum to access the heating element if your dryer’s rear panel looks to be relatively flat. Additionally, you can find instructions on opening the dryer’s cabinet in the Resources section because not all dryers are assembled similarly.
- Look for the high-limit thermostat on the side of the dryer’s circular heating element or rectangular heating element housing. Two wires are attached to the black, rounded high-limit thermostat. If you cannot remove the wires from the thermostat with your fingers, use needle-nose pliers to remove the wires from the thermostat’s terminals.
Tip:
Take the two wires out of the terminals on the heating element. These terminals are located at the bottom of the spherical heating element and below the high limit thermostat on the housing element.
- Connect the wire of a continuity tester’s alligator clip to one of the dryer’s heating element terminals. You need to touch the tester’s needle tip to the opposite terminal. The heating element is in good condition if the continuity tester’s inner light illuminates, and the heating element needs to be changed if the tester stops glowing.
How to Fix a Dryer Heating Element
Since the heating element produces heat in the dryer, examine it if the air inside doesn’t warm up. If the air isn’t heating, you’ll probably need to fix the dryer heating element. You can examine the heating element for signs of damage or heating coil breaks. Replace the damaged heating element with a dryer heating element dryer part that the manufacturer has approved. Contact us for Dryer Vent Installation and Repair in Norcross.
To replace the electric heating element in a dryer, follow the instructions in this repair guide.
Tools needed
- Driver for 1/4-inch nuts
- Screws with slots
- A vacuum or shop vac
- Working gloves
Instructions
1. Offset the power
To turn off the dryer’s electricity, unplug it.
2. Take off the back panel
To remove the screws from the back panel, advance the dryer and use a 1/4-inch nut driver. The dryer’s back panel should be removed and set aside.
Advice: Vacuum the dust and lint out of the dryer cabinet while it is open.
3. Remove the cables
You can find the dryer’s heating element close to the bottom. To ensure proper connection later, mark the location of the wires leading to the heating element and high-limit thermostat or take a digital snapshot of them.
If necessary, peel the wires off the spades with a slot screwdriver as you disconnect the cables.
4. Get rid of the heating element.
Using a 1/4-inch nut driver, unmount the heating element from the heater box by removing the mounting screws.
5. Connect the new heating element with the high-limit thermostat.
Install the high-limit thermostat on the new heating element after removing it from the old one.
6. Place the replacement heating element In place
Align the mounting screw holes on the heater box with the new heating element’s position. The mounting screws should be inserted and tightened tightly.
Following the labels or digital image, properly connect the wires to the new heating element.
Warning: The wires must be correctly connected for safety and to prevent harm to the new element. Have a service specialist handle this fix if you’re unclear about how to connect the cables.
7. Put the back panel back in place
Place the back panel on the dryer’s back. Moving further, fix the mounting screw holes in place. You need to tightly insert the mounting screws. After that, tighten them tightly.
8. Hook up the dryer
To restart the dryer’s electrical supply, plug it into a wall socket.
Attention: Repairing appliances might be dangerous. Therefore, use the appropriate tools and safety gear listed in the manual, and abide by all directions. Wait until you are sure you understand every step and can finish the repair before moving further. Moreover, Trained professionals should only carry out certain repairs.
Also Read: FIVE STEPS USED AS DIGITAL MARKETING STRATEGIES IN 2022